Salesforce Integration
The Salesforce Integration feature in TextUnited allows you to translate help articles directly from your Salesforce knowledge base. This guide will walk you through the process of setting up the integration, selecting content, choosing languages, and managing your translation project.
Prerequisites
Before starting with the Salesforce integration, ensure that your articles in the Salesforce knowledge base are published and have an assigned category. Follow the steps below to prepare your articles in Salesforce.
Setting Up Categories in Salesforce
- Navigate to Data Category Setup:
- Go to Setup in Salesforce.
- In the search bar, type Data Categories and select Data Category Setup.
- Create a New Data Category Group:
- Click New to create a new data category group.
- Give the group a name (e.g., “Help Articles”) and save it.
- Create a Category:
- Within the new data category group, click Create New Category.
- Name the category and save.
- Activate the Category Group:
- After creating the category, ensure the data category group is activated so it can be used in your articles.
Assigning Categories to Articles in Salesforce
- Navigate to Knowledge:
- Go to Service in your Salesforce account, and then click on Knowledge to view all articles.
- Open an Article Draft:
- Select the article you wish to categorize and publish.
- Click on Edit.
- Assign the Category:
- In the article editing view, choose the category you previously created from the category dropdown.
- Publish the Article:
- Ensure the article is published by checking the publication status. Only published articles can be selected during the TextUnited integration.
Once these prerequisites are completed, your articles will be ready for integration with TextUnited.
Setting Up Salesforce Integration in TextUnited
Step 1: Log into Your TextUnited Account
- Log into your TextUnited Translation Software account. (Refer to this guide for creating an account and logging in.)
- On your dashboard, click on the Start a New Project button.

Start a new project button
Step 2: Select Salesforce Integration
- From the project creation options, select Salesforce Integration.

Salesforce Integration option
- You will be prompted to grant TextUnited access to your Salesforce account.
Step 3: Grant Access to Salesforce
- Click on the Allow button.
- Follow the on-screen instructions to authenticate and allow TextUnited to connect to your Salesforce account.

Allow access
Creating a Translation Project
Step 1: Choose Content
- After granting access, you will see a window with four steps outlined. Start by entering a name for your project. The first step is titled Choose Content.
- Select the articles you want to translate from the list, categorized based on the categories assigned in Salesforce.
- Click Continue to move to the next step.
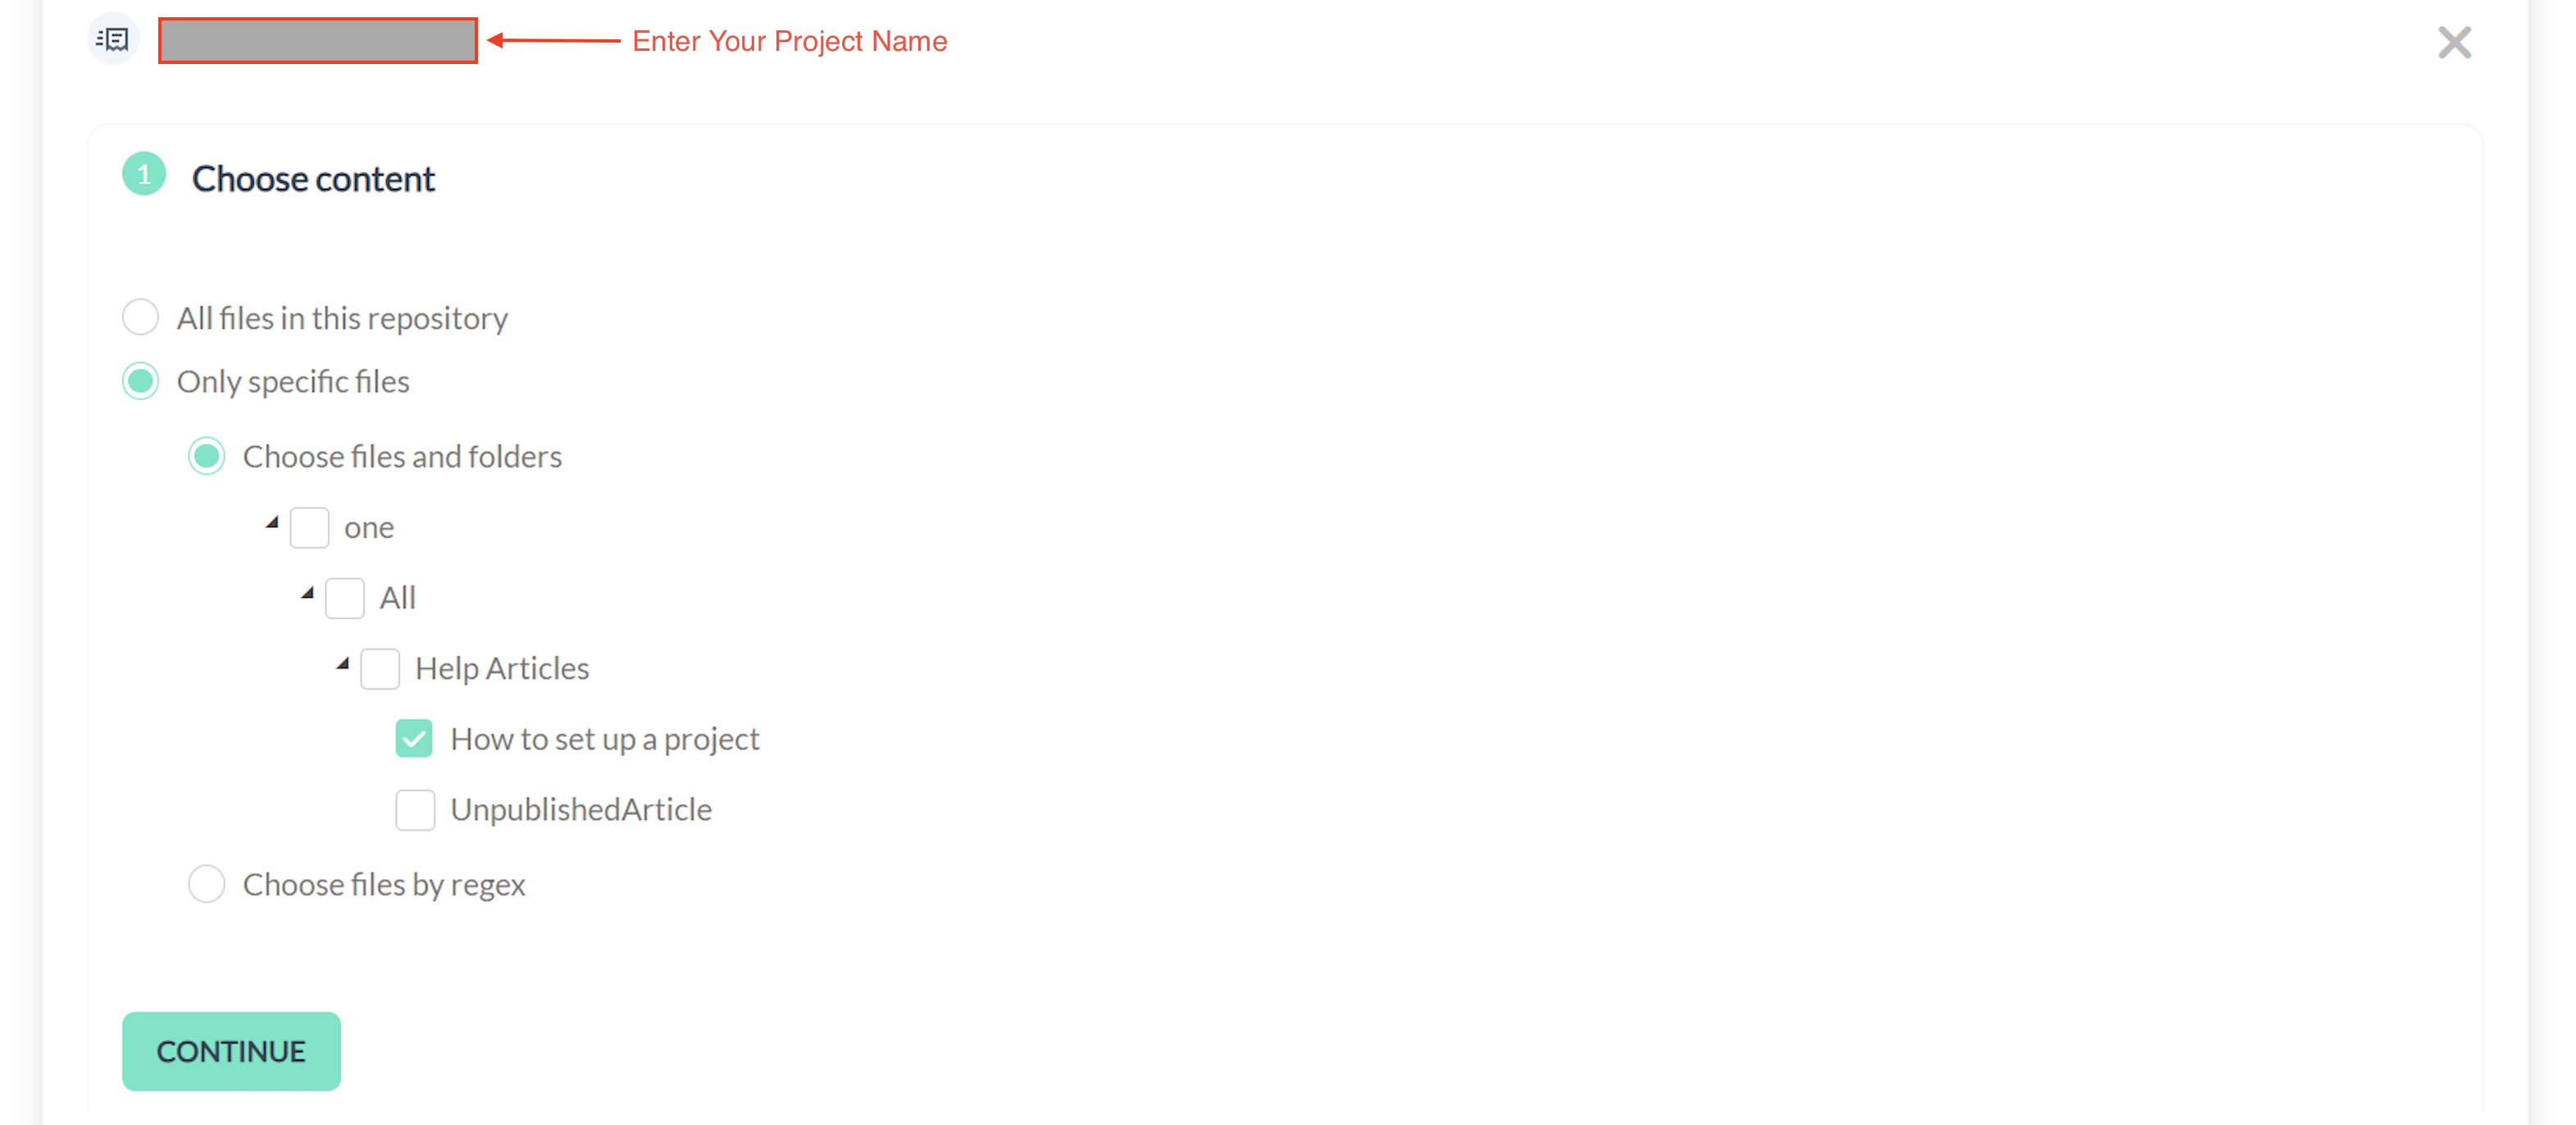
Enter Project Name and Choose content files to translate
Step 2: Choose Languages
-
In the Choose Languages step, you will be prompted to select the source and target languages:
- Translate From: The language of your original content (this is usually auto-detected).
- Translate Into: The language(s) you want your articles translated into.
-
If you choose a language that is not enabled in your Salesforce account, an alert message will appear below the Translate Into field. To enable languages in Salesforce:
- Go to Setup in Salesforce.
- Navigate to Language Settings and enable the required language.
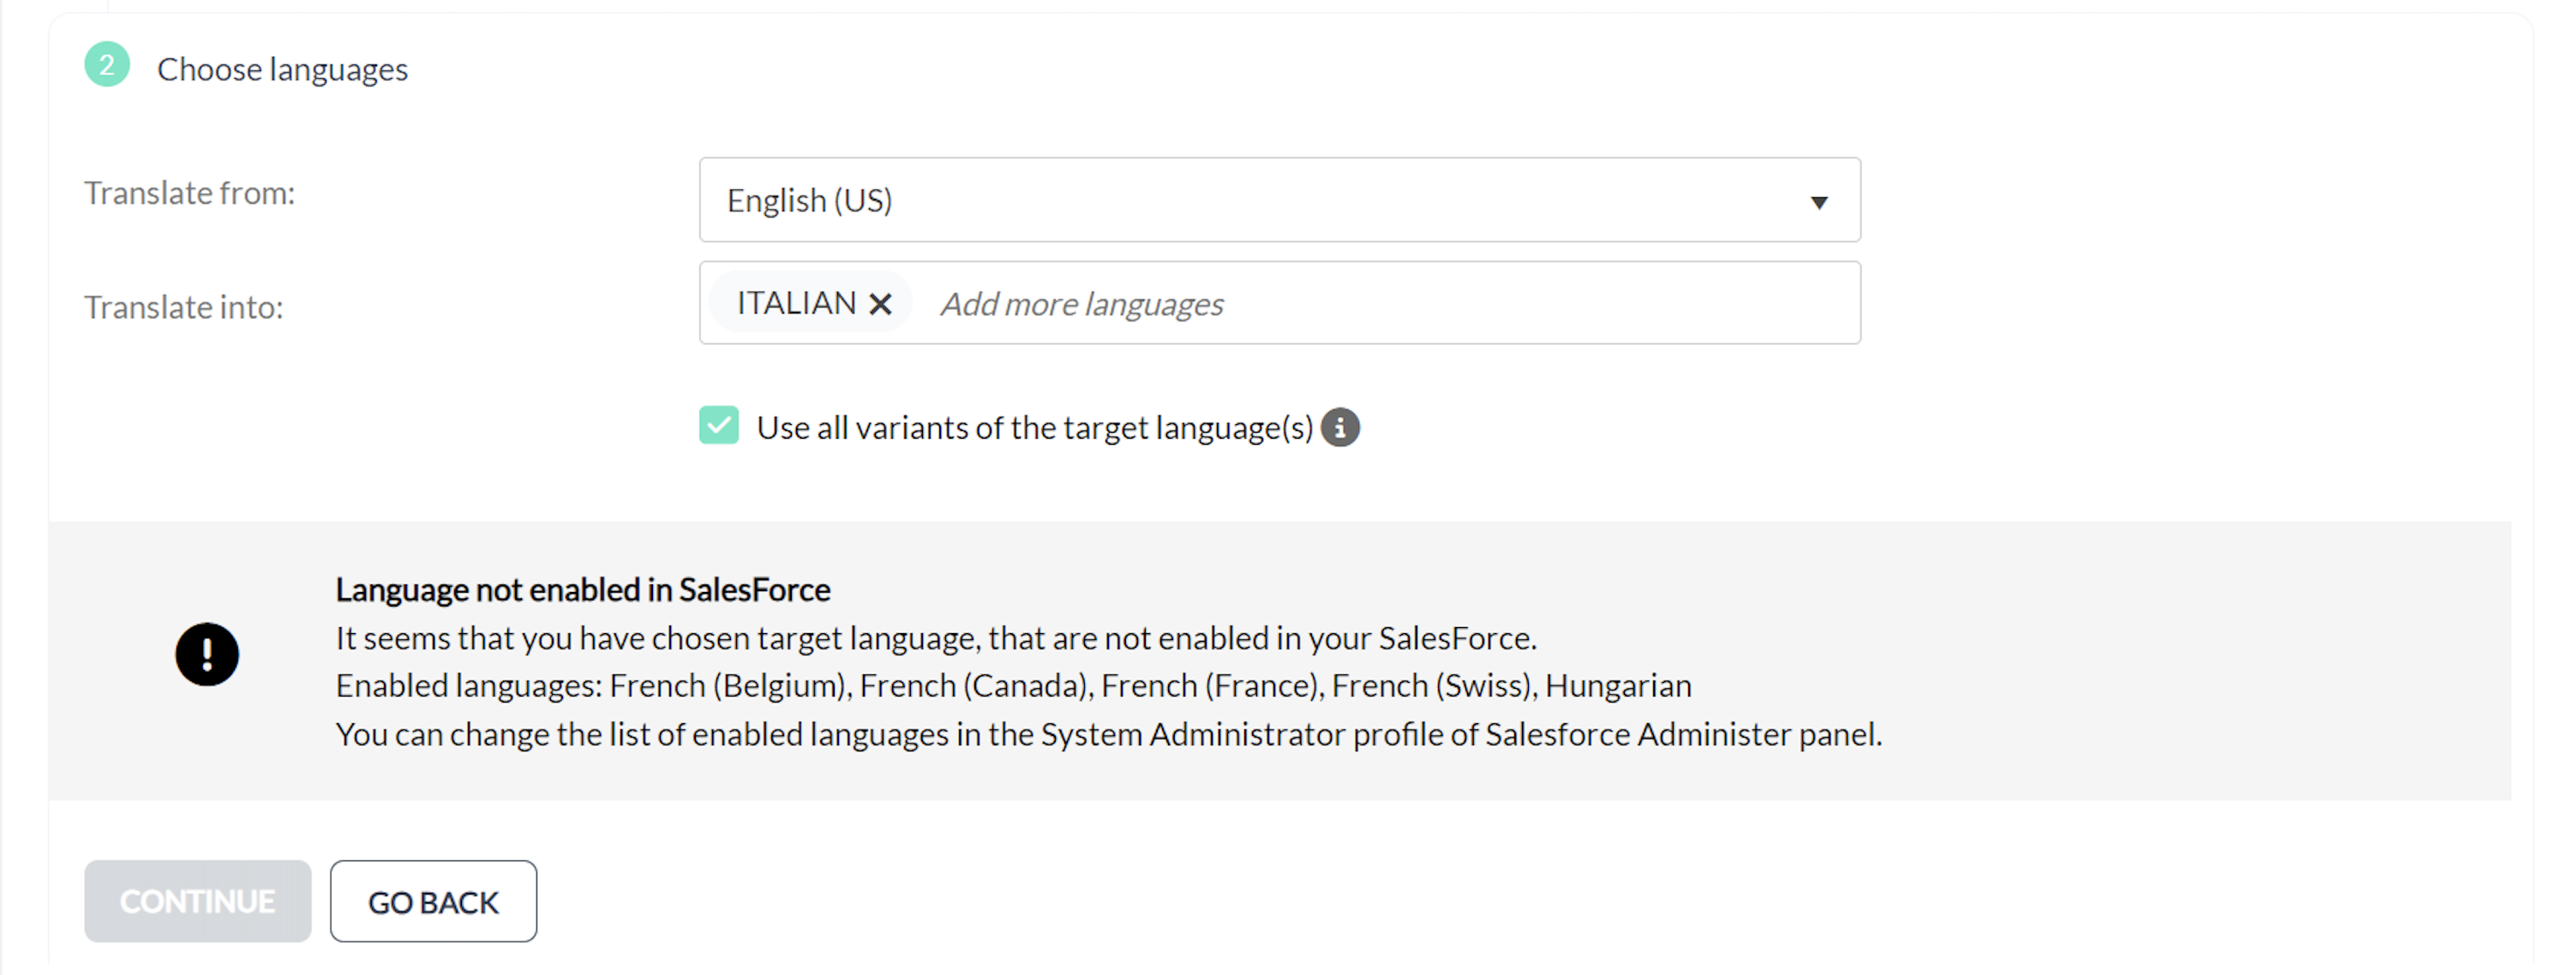
Choose languages step - Alert message
-
The error alert will not disappear on its own. However, after the language has been added, you need to start a new project in order to be able to select this new language. Then, click CONTINUE:
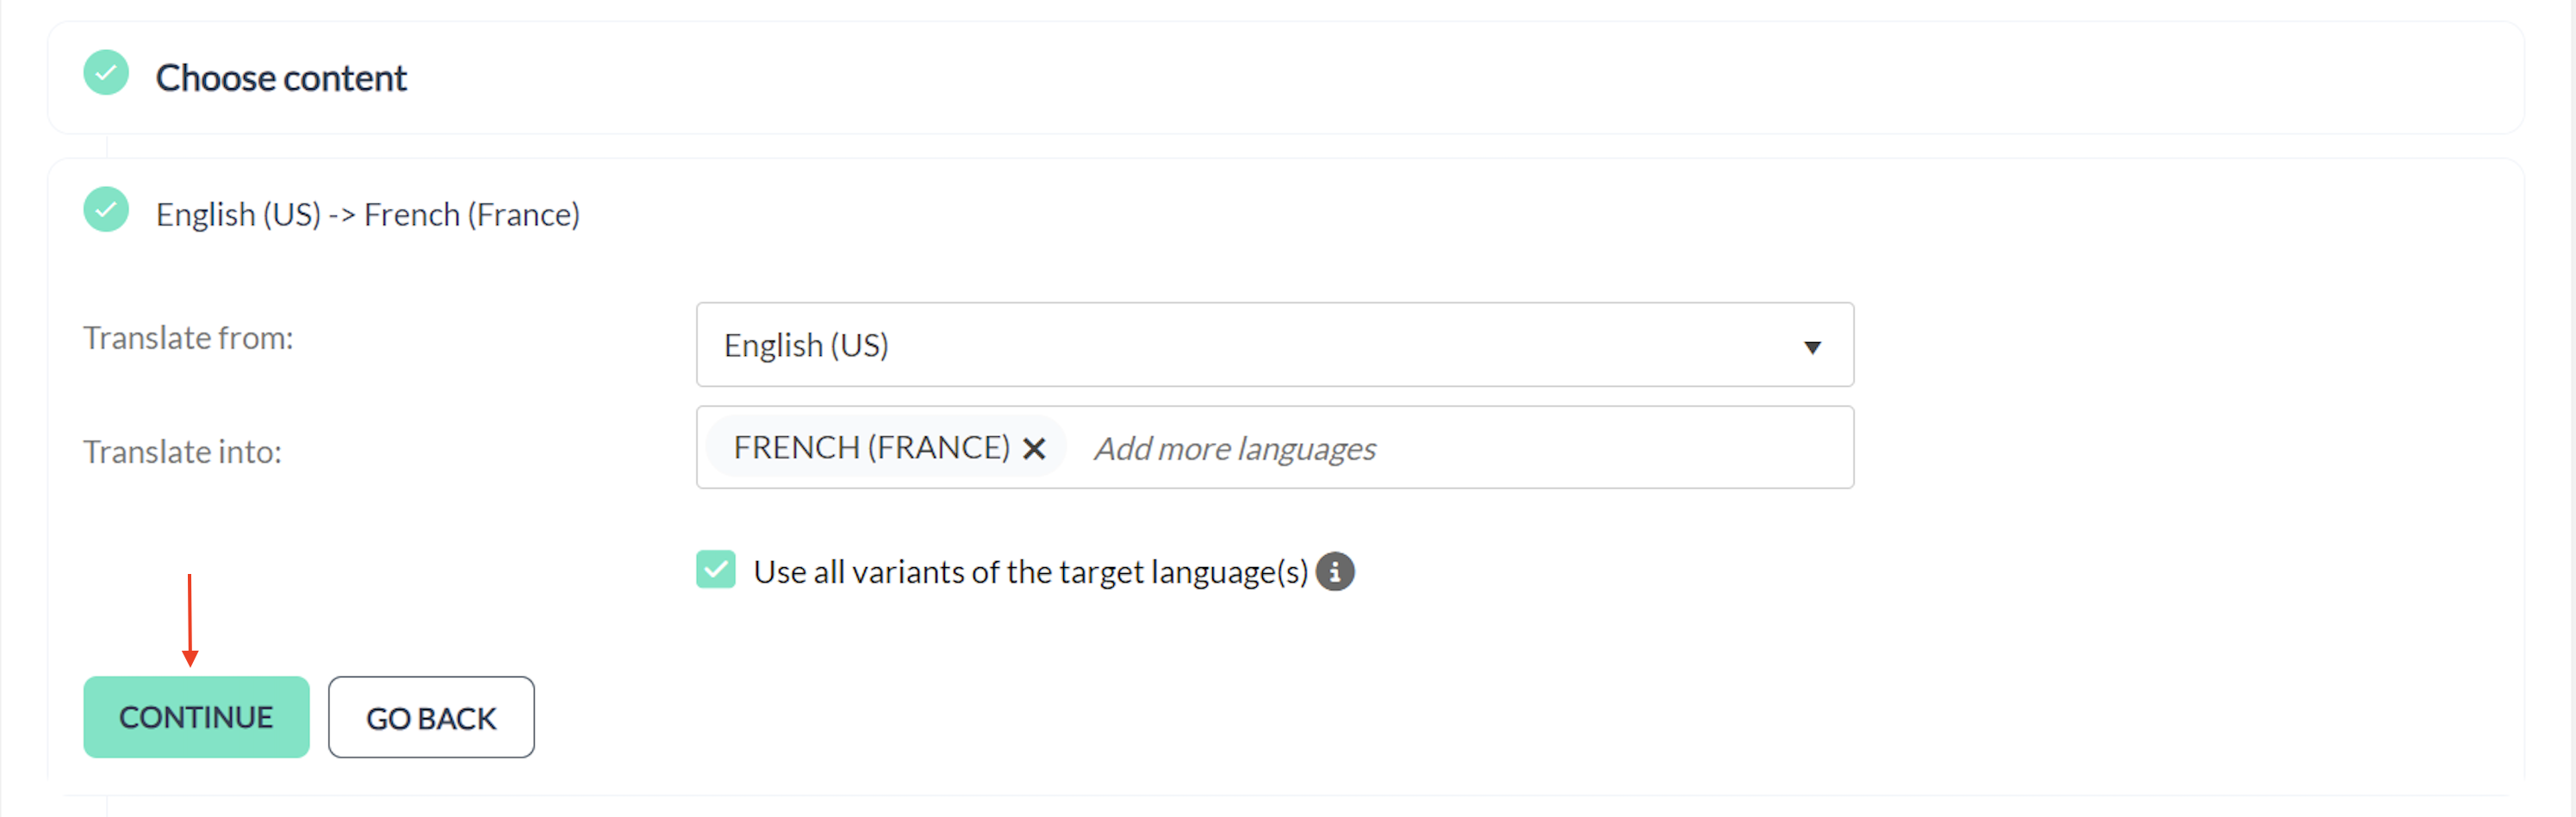
Continue button
Step 3: Choose Who Translates
In the Choose Who Translates step, you have two options:
- Me & My Team: This option allows you to manage the translation process internally, either by translating yourself or assigning the task to a team member.
- Professional Full Service: This option lets TextUnited manage the translation process for you, utilizing professional translators and project managers.
Select your preferred option and click Continue.
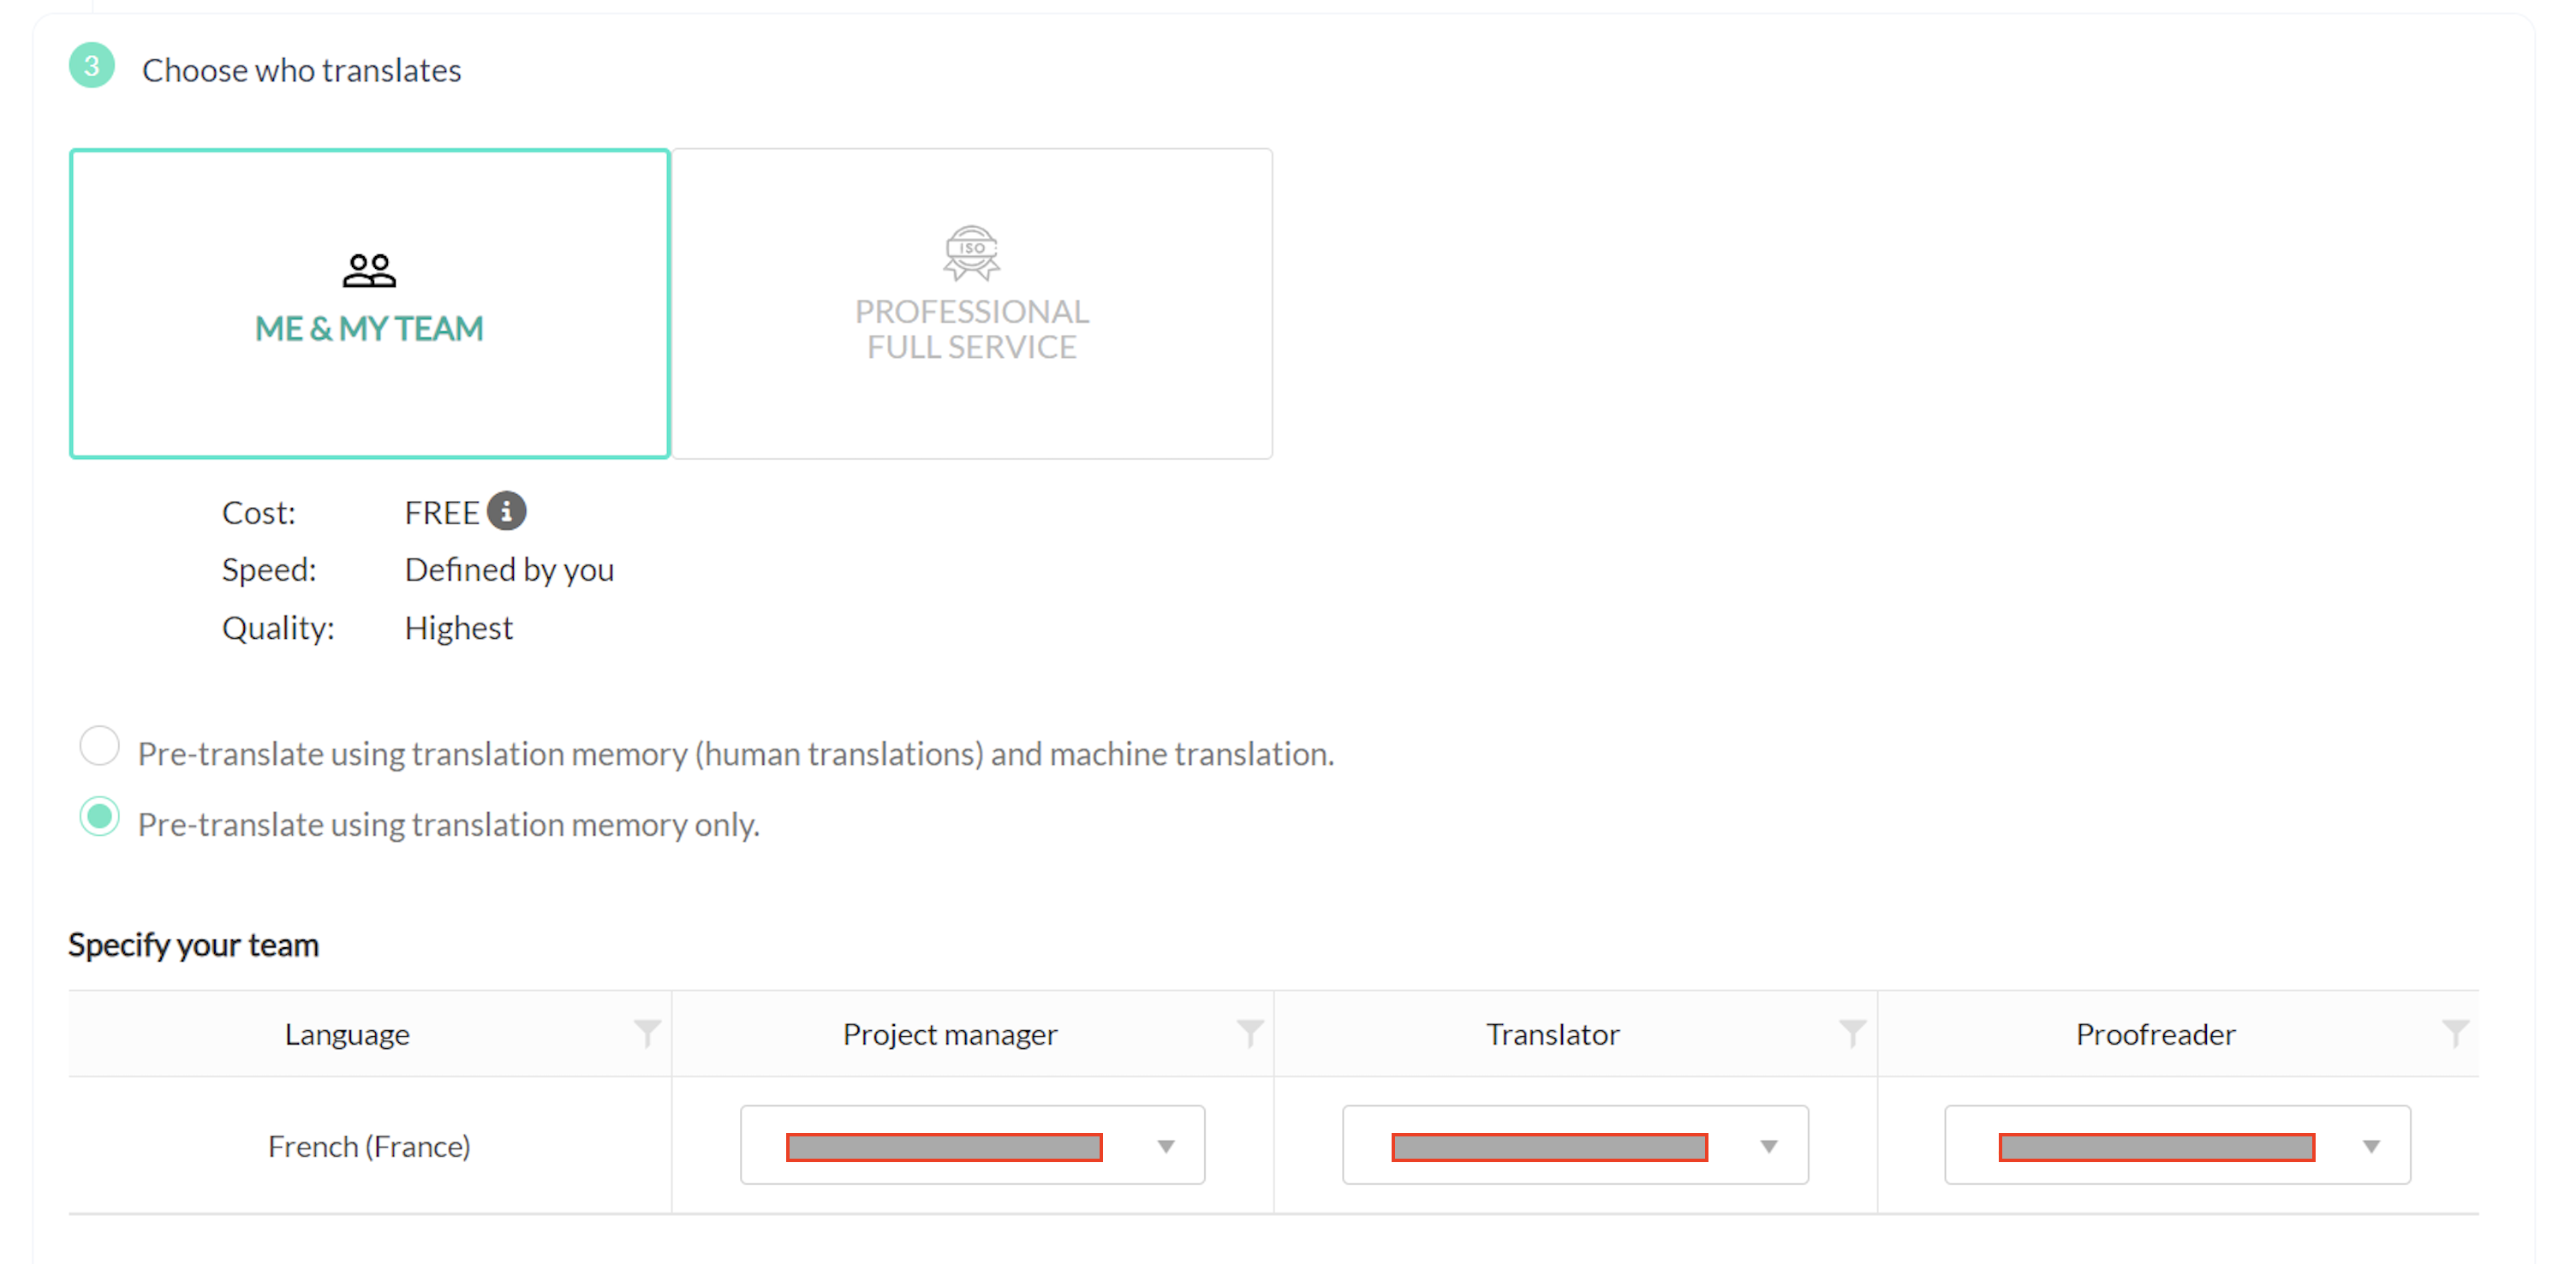
Choose who translates - Me & My Team option
Step 4: Add Details
In the final step:
- Review your selections (content, languages, and translation method).
- Click Create a Project to finalize your project setup.
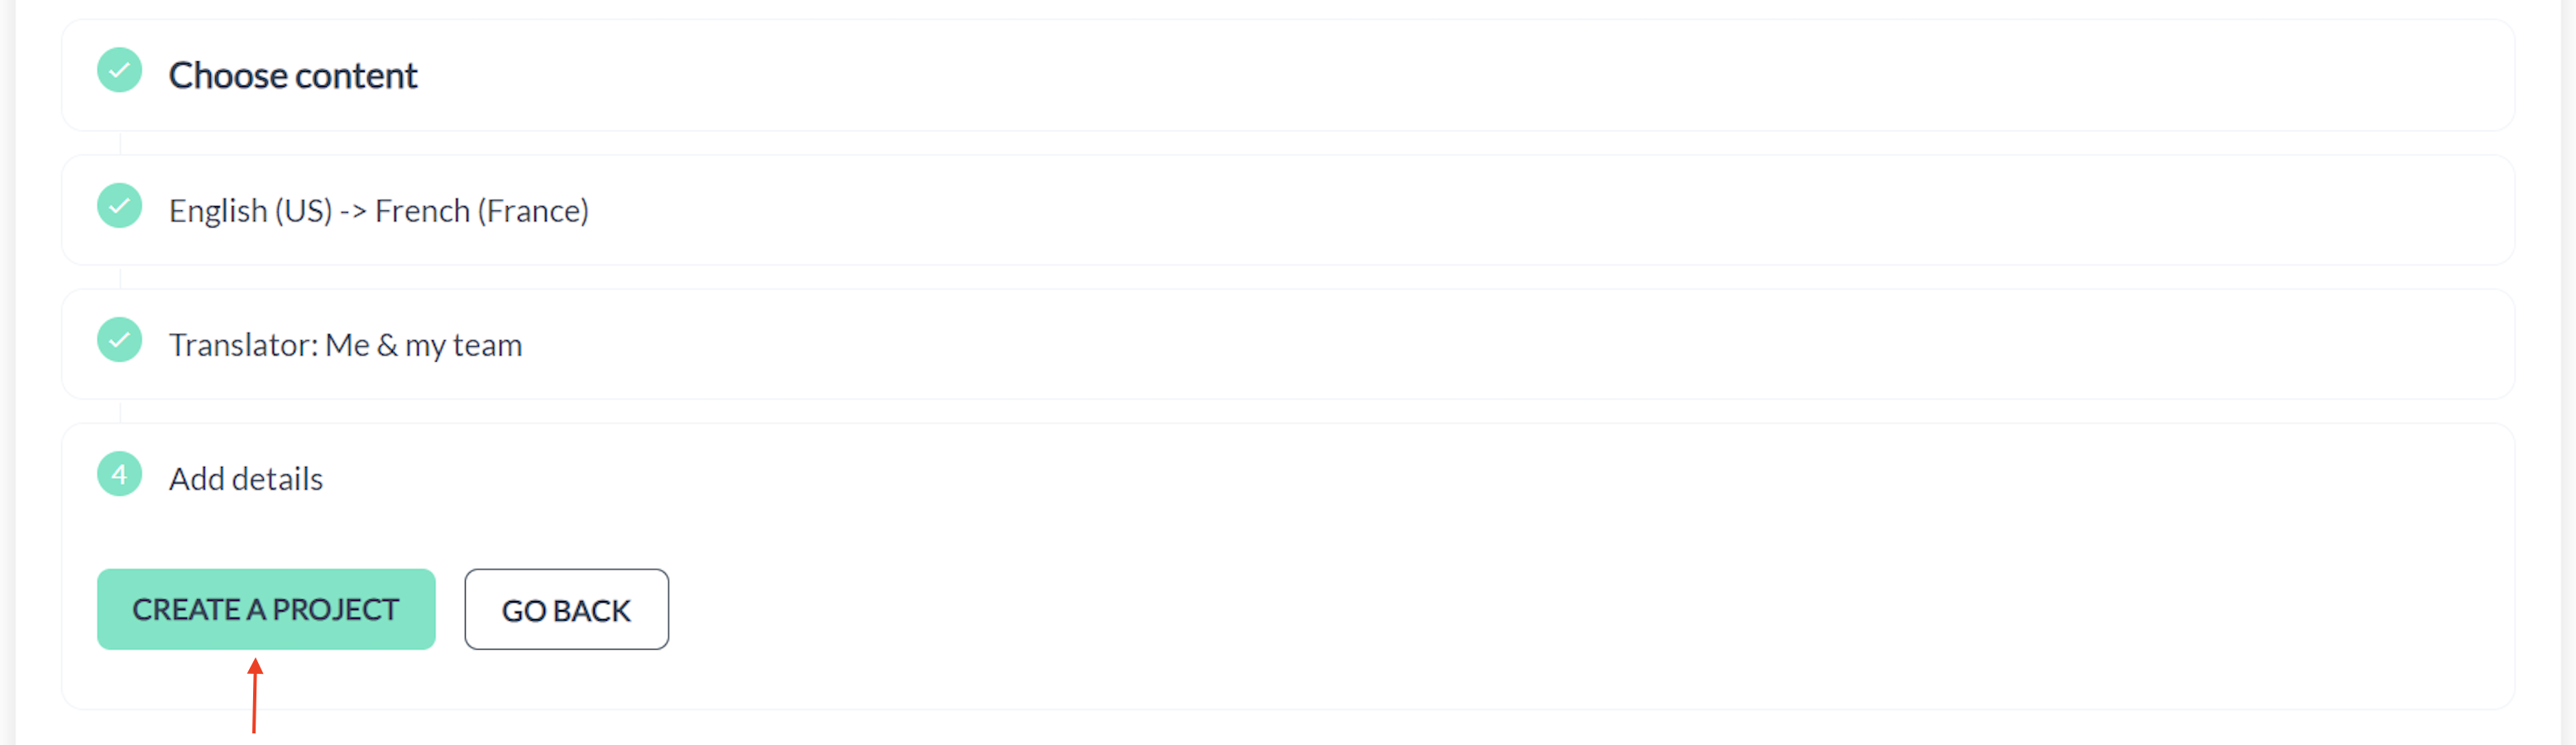
Create a Project
Success!
You have successfully set up and initiated a Salesforce integration project in TextUnited. From here, your articles will go through the translation process according to the options you've selected. For further assistance or troubleshooting, visit our help center or contact support.
Updated 9 months ago